
Pom Pom Robins. This project follows the techniques used in previous projects such as this and this, but with a few added colours and pipe cleaners [and is presented in a different font which I can't seem to correct - sorry!]
What I Used:
Create and Play Animal Pack [£2.00 HobbyCraft]
Scissors


This robin can be made any size, so create your pom pom template from anything round in your proximity that is of a size you would like your robin to be [I find old ribbon reels perfect for this]:


I started with the robins red tummy. To me, you can’t really have a red tummy too big on your robin, so it’s always better to go large or go home and wrap around a third of your template in at least 5 layers of wool. The more layers you create, the larger and fluffier the redbreast, so this may be an area for experimenting with, but I wrapped 10 tight layers of red wool to achieve the tummy you see on the large robin:


Next, I decided to add a bit of detail with a layer over the top of the red in white wool. For the smaller robin, I wrapped this fairly sparsely and for the larger robin, three times over to cover the red wool:

Lastly, cover the entire template in brown wool – overcompensate on the two thirds without the red and white wool to even your pompom out and I decided to keep wrapping my wool until I could wrap no more. Round, fat and fluffy robins are my aim. I left a small section free to make cutting the pom pom easier, this is especially useful for smaller robins or if you have wrapped your wool tightly.

The next stage was trial and error for me, but involved pipe cleaners and if pipe cleaners are anything, they are flexible, so don’t worry if this goes slightly awry at first – it can all be fixed. Place one black pipe cleaner, folded through the pompom template with each end parallel to the top of the red breast [this will be at around a clock face 2 on your template]. These will be your eyes. Next, fold one yellow pipe cleaner in half through the template at a right angle to the bottom of the red breast [around a clock face 6 on your template]. These will be your legs.

You are now ready to cut your pompom – hold the pipe cleaners in place with one hand whilst you cut the wool around the top of the template. As the cuts are made, the wool will begin to hold the pipe cleaners in place for you. Once complete cut, tie a length of brown wool to secure it all in place tightly and securely.


Once the wools is cut, remove your template carefully and then you can begin shaping the pipe cleaners.

Trim the black pipe cleaners to around 2cm above the pompom length and then bend the tops down and then around into circles of a size you like, trimming any excess. The metal of the pipe cleaners will show through and you can thread the very ends to appear in the centre of the moulded shape to make the eyes.


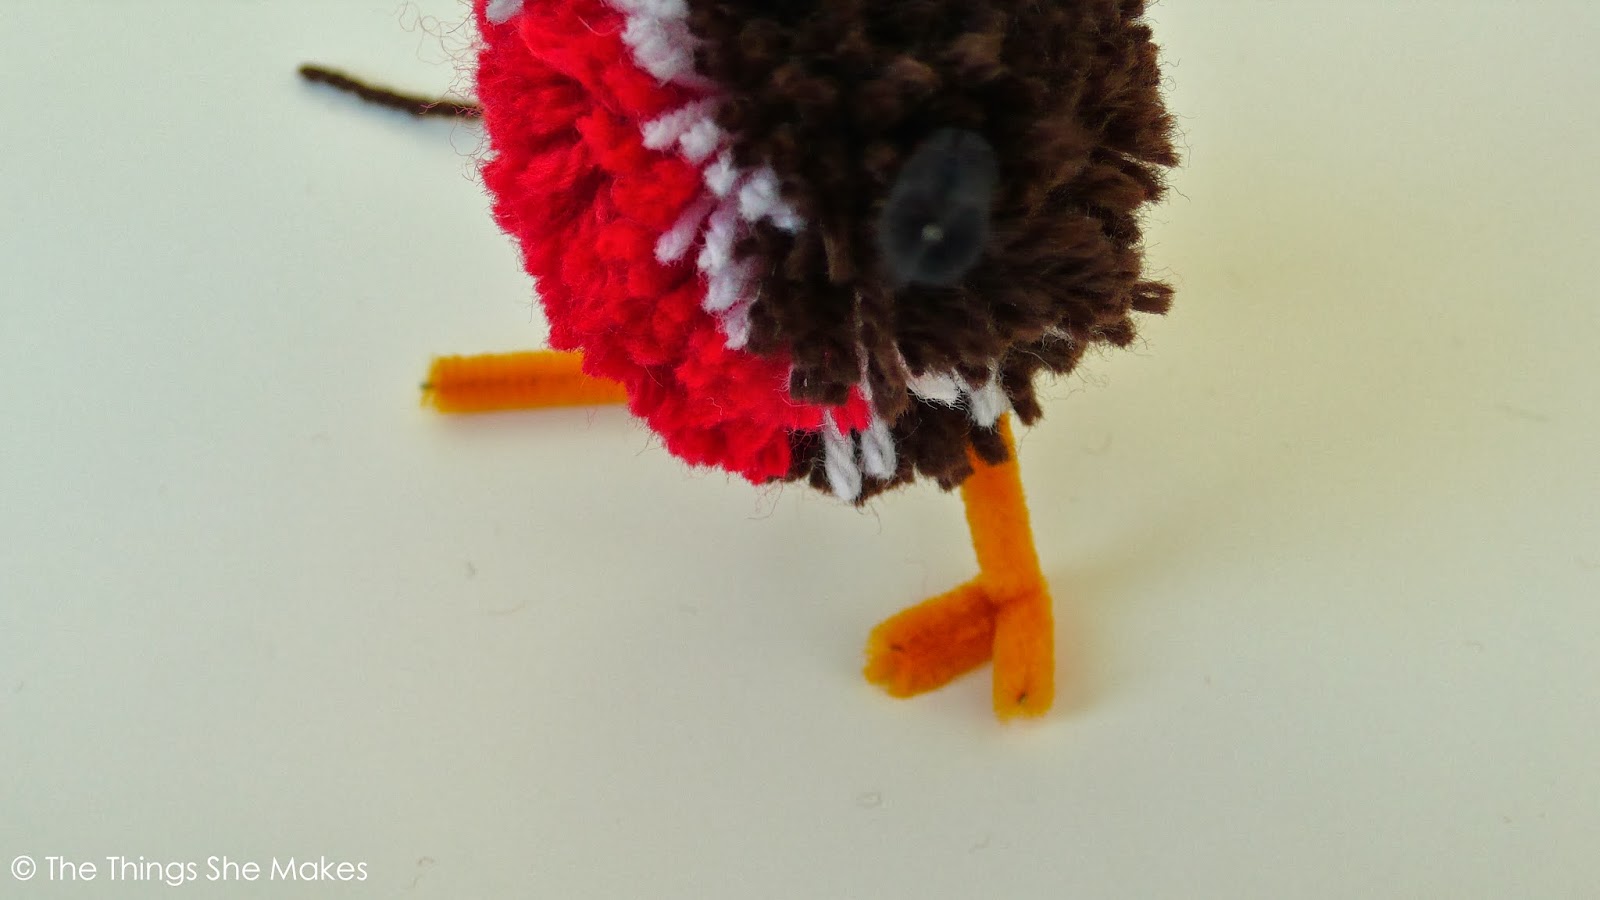
The feet can be formed by bending the pipe cleaner into claws and then adjusting their form
until they can hold the weight of the robin.


For the finishing touches, you can use either more pipe cleaners or fabric, such as felt. I formed the beak using a trimmed piece of yellow pipe cleaner and moulding the end into a triangle, leaving a length at the other end that could then be stuck into the pompom, just above the redbreast and between the eyes. You could also create this from a piece of yellow felt and stick it easily in place. I decided not to add wings, but I think I may change my mind about this. If I do, I’ll cut them from felt and leave a fastening which can be glued in place and then hidden with the pompom.


...a few snips to neaten the wool and your robin is complete.

These are perfect film-watching crafts [I think I’ve based all of my recent posts around the ability to do them in front of the TV] and versions with one colour could be made for reindeer or snowmen, or half white and half brown for Christmas puddings? I think I know what I’ll be attempting next year!

This is my last crafty project before Christmas - tomorrow, I’ll be posting a Christmas treat idea every day until Christmas Eve, when we’ll all be collapsing in to our sofas, watching films and enjoying a few days off. Each will become a little less involved as we get nearer to Tuesday. So, if you fancy a few festive treats to make in the kitchen with the radio on, or with some little helpers, hopefully they’ll be something for you. If you’re food shopping and fancy a heads up, tomorrow there will be two posts: Christmas Pudding cupcakes and cake pops, Christmas teacakes (round 2) and the weekend will hold Christmas mint creams and marshmallow pops, finishing on Monday with some Christmas chocolate breadsticks. All will be quick photo examples, so nothing too much as we’ll all have enough to do and be thinking about. I hope you enjoy.
See you tomorrow x
I think I'm in love, I think I need to try this one out, I think my own robin in my garden will be very jealous indeed though if he saw it... ;)
ReplyDelete